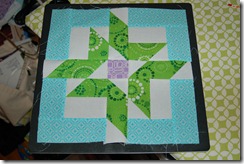
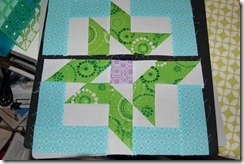
I don’t know, sounds like a good name for this block, right? It’s like an exploded Friendship Star.
May is my month for the Seams Perfect - A Modern Scrap Bee and it really snuck up on me. I had been mulling around a bunch of different blocks when I saw this one on Saturday. It was in a photo album on a Yahoo group and the woman who made the quilt said it was made out of jelly rolls. I really liked the layout but a quick look told me it was a 7-grid block, and 7x jelly roll (2 inches finished) would make a 14 inch block. So, I opened up EQ7 and drafted it out and they came out to 2-1/4 inch strips for this block. That’s all fine and dandy, but that means all the other measurements are a little odd too.
But don’t panic, I’ve laid out the whole thing and if I can do it without making a mess, you can too.
Here’s how you make it.
You need three prints and one solid.
- Cut a WOF x 2-1/4 inch strip of Color A (Blue)
- Cut a WOF x 2-1/4 inch strip of Color B (Green)
- Cut a 2-1/4 x 2-1/4 inch square of Color C (Purple)
- Cut a 16 x 2-1/4 inch strip of solid (White)
- and an 18 x 2-5/8 inch strip of solid (White)
Cut the fabrics into these pieces:
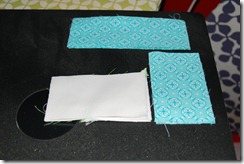
- Sub-cut Color A into 4 strips 5-5/8 inches long, and 4 strips 3-7/8 inch long.
- Sub cut the 2-1/4 inch solid strip into 4 strips 3-7/8 inch long.
- Sub cut the 2-5/8 inch solid strip into 6 squares, 2-5/8 x 2-5/8.
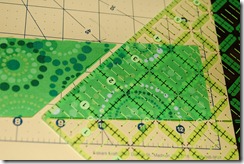
With Color B, you need to cut 45 degree angles, so use a ruler with a 45 degree angle line on it.
Cut the strip in half, and stack both strips right side up on top of each other. If you don’t do this, half of your pieces will be going the wrong way.
Measure 4-1/4 inch from the right side and mark it on the bottom of the strip. 
Line up the 45 degree line along the bottom edge of the strip, and cut along the side of the ruler to the top of the strip. That makes 2 chisel shapes.
Next, measure 4-1/8 from the bottom where you just cut, line up the 45 degree angle again, and cut.
That makes 2 parallelograms.
Repeat with 2 more paralellograms, then measure 4-1/4 inches from the cut line along the top of the strip, and cut straight down to create 2 more chisel shapes.
You can discard the remaining Color B.
Sub-cut the 6 solid squares in half on the diagonal to create 12 Half-Square Triangles.
The remaining pieces are all rectangles as described above, so I didn’t photograph them.
Assembly
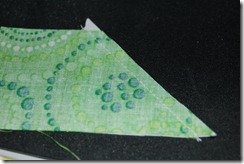
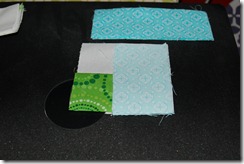
Lay the triangles on the chisels as shown. You should have a dog ear on the short side of the chisel.
With the parallelograms, lay the triangles the same way – with the edge and hypotenuse aligned, and a dog ear on the opposite side.
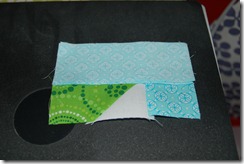
Sew with a 1/4 inch seam allowance. If you start at the point, you should cross the dog ear. Hopefully you should be able to see what I mean in the photo.
Press toward the color on both the chisels and the parallelograms.
Cut off your dog ears for easier sewing to the next pieces.
Lay out your shapes to get your bearings.
Lay the solid on the chisel piece, and sew along the long side of the chisel.
Press towards the darker color. Keep building out, log cabin style, pressing towards the color.
Sew each of the four corner quadrants and lay it all out again to get your bearings.
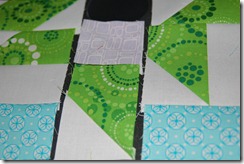
Sew the horizontal parallelograms to the quadrants below them.
Sew the center square to the parallelogram below it.
Sew the center/parallelogram to the corner quadrant on the right.
Press open and sew the left corner quadrant to the center/parallelogram.
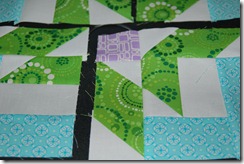
You can see above that my piecing wasn’t perfect. If you need to square up the corner quadrants, they should measure 5-5/8 inches square, which is the length of the longer Color A piece.
That looks much better after I trimmed of that piece.
Join the top two corner quadrants to the remaining parallelogram piece in the center.
Join the top and bottom pieces together.
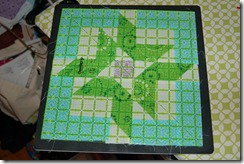
Ta da!
Pretty close to 12-1/2 inches square!
Don’t freak if yours doesn’t come out perfect, I’ll put sashing between the blocks so there’s room for error. I’m actually amazed mine worked out so well!

