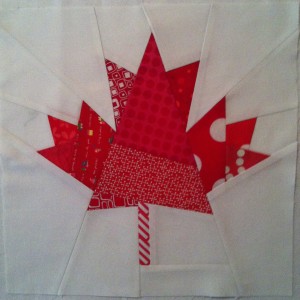
When I was a child, I used to visit my Grammy and Grampy in Saint John, NB. My Grammy had a maple leaf quilt on her guest bedroom and I loved that quilt. My Grammy died a few years ago, and my aunt got the Maple Leaf quilt, but I never stopped thinking about it. I’ve wanted to recreate it for years, but I could never quite find the right leaf shape. Hers looked like a real flag leaf, not the stylized half-square triangle leaves I’ve seen online.
Recently I saw a scrappy, multi-colored version here, http://naptimequilter.blogspot.com/2013/03/oh-canada.html and that got me going to try and find the leaf I was looking for. I found an image of the leaf and traced it in EQ7, and broke it down into manageable pieces. I still want it to be all red, not multi-colored like hers, but it was the inspiration to get me going again.
Now that it’s my month for the BeeAdventurous bee of the LAMQG, I’d like you to make me two maple leaves so I can re-create my Grammy’s quilt. Thank you for helping me make this quilt that I’ve had in mind for so long.
There are tons of foundation paper piecing tutorials online, so you can search for a tute or a video online to show you how to do it if you aren’t familiar with the technique. This one is really good, but requires you make a copy of the pattern and cut it up, but otherwise the instructions are great. Here’s another with some good tips, too.
I broke this down into manageable pieces to make it easier to assemble.
The basics:
- Cut out the shapes A-G on the thin lines. You will sew on the thick lines. It helps to actually separate the pieces rather than trying to sew them all to the full size sheet of paper and trim up later.
- You place the fabric on the non-printed side of the paper, so you may need to hold it up to a light to get the placement right.
- You sew from the printed side of the paper.
- The shaded areas are where you use a red fabric, and the clear areas are where you use the white fabric.
- Piece number 1 is always facing away from the page (or up), and each subsequent piece faces toward the page (or down), always on the non-printed side of the paper. I actually basted my piece 1 with a few stitches so I wouldn’t forget to put it on the right way. You can also use a glue stick to tack it down.
- Make sure that each piece covers the seam allowance and the center of the piece.
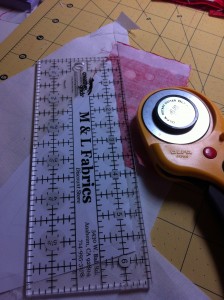
- After each seam is sewn, fold the paper back along the seam you just sewed. Place your ruler with the 1/4″ line on the folded back paper edge, and trim off outside the seam allowance, leaving a 1/4 inch, just like normal piecing. This is necessary to avoid bulkiness and complications in later piecing. I almost always forget the last seam, so try and remember it!
- Use a shorter stich length, 2.0 or less. I usually use a 1.8. I don’t want the stitches to pull out at the end when I remove the papers, and the shorter stitch length means the papers will rip off easier.
- Please don’t use steam – I printed on an inkjet printer and it may stain the fabric if you press with steam. That being said, I usually finger press as I go, and give each segment a good press before joining them together.
- In one of my test blocks, I pieced the fabric for some areas. If you need to do that, feel free. It will make for a scrappier block. Also, if you have some great red fabric you’d like to add, I would love that!
- If you run out of fabric, just do what you can with what you have – I can always add more in later.
- Please try to use all of the red fabric; don’t use the same fabric more than once in the same block.
- When joining the completed sections to each other, it’s really helpful to put pins in the intersections and along the seam to make sure you don’t lose any fabric or wobble out of the seam allowance. When joining sections, it helps to press the seams open since the paper is in there.
- You can click on any of the photos in this post to see them full size.
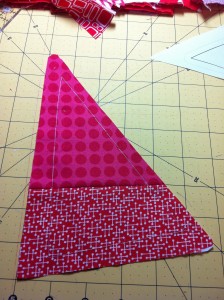
Starting with section A, you just put your largest piece of fabric on the back of that piece and put it aside until you join it together. Baste it right to the paper for a more stable assembly later, and for trimming it. (This image shows the piece I made by joining two fabrics. You don’t have to do this.)
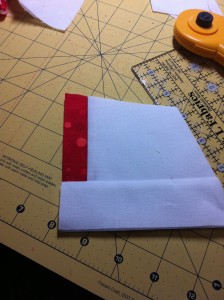
Section B starts with a small red piece and a larger white piece.
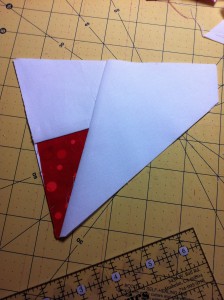
Section C is a little more complicated that section B. Start with pieces 1 and 2 and trim before adding piece 3.
Sections D and E are similar to section B in their piecing.
Sections F and G are the most complicated sections, and they are really not that hard, just start with piece 1 facing up, then lay piece 2 face down, making sure it covers all of section 2 when you fold it back. Sew the seam on the line between 1 and 2, fold #2 back to make sure it covers the whole area, then fold it back over area 1 and trim off all but the 1/4” seam allowance.
Keep going in numerical order, adding the next piece face down, checking and trimming until the whole section is done.
When all of the sections are done, lay out your sections in the leaf shape.
Join section C to B.
Join A to the top of BC
Join E to G and join F to D.
Join ABC to EG. This is where the pinning intersections comes in really handy. I also pinned along the seam allowance to make sure nothing escaped out the sides of the paper.
Join ABCEG to FD. Here’s the back of the block and you can see the seams are pressed open.
You’re done block 1! It should measure 12.5″, but if it’s a little shy or ragged, don’t worry, I plan to shave the blocks down to the same size all around.
Please make two blocks.
If you need to print out a new template, you’ll find it here: Maple Leaf. It prints on US Legal paper (8.5 x 14″).
Thank you!
adnohr

